Learn how to interface the MFRC522 RFID reader module with the ESP32 board. You’ll learn how to get raw RFID data, get the RFID card UID, and add personal data to the RFID cards. We’ll use the Arduino_MFRC522v2 library and the ESP32 will be programmed using Arduino IDE.
In summary, in this tutorial we’ll cover:
- Introduction to the MFRC522 RFID Reader/Writer
- Wire the MFRC522 RFID Reader/Writer module to the ESP32
- Read RFID card raw data
- Read the RFID card UID
- Write/Read personal data to and from the RFID card
MFRC522 RFID Reader/Writer
In this tutorial, we’ll be using the MFRC522 RFID reader/writer and that’s the one we recommend you getting to interface with the ESP32.
RFID means radio-frequency identification. RFID uses electromagnetic fields to transfer data over short distances and it’s useful to identify people, make transactions, etc. Some stores also use RFID tags on their products’ labels to identify them.
An RFID system needs tags and a reader:
- Tags (proximity integrated circuit cards—PICC) are attached to the object to be identified, in this example, we have a keychain and an electromagnetic card that come with the MFRC522 RFID Reader/Writer module. Each tag has a unique identification (UID).
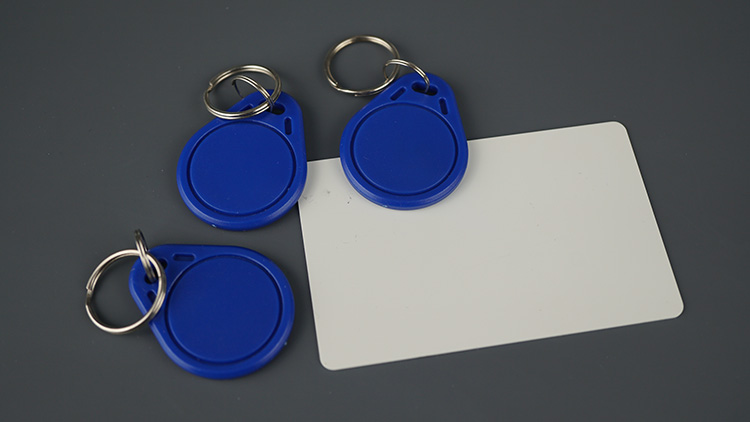
Reader/Writer (proximity coupling device—PCD) is a two-way radio transmitter-receiver that sends a signal to the tag and reads its response.
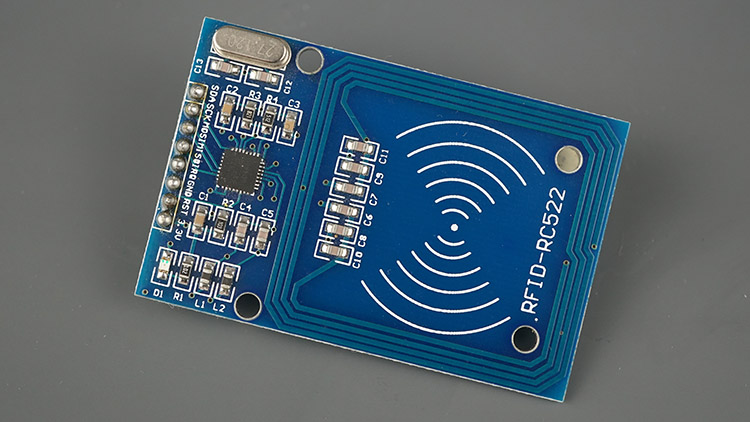
The MFRC522 RFID reader works at 3.3V and supports SPI and I2C communication protocols. The library we’re going to use to control the RFID reader supports both protocols, but we’ll be using the SPI.
Parts Required
Here’s a list of the required components for this project:
- ESP32 DOIT DEVKIT V1 Board (read Best ESP32 Dev Boards)
- MFRC522 RFID Reader/Writer + tags
- Breadboard
- Jumper wires
You can use the preceding links or go directly to MakerAdvisor.com/tools to find all the parts for your projects at the best price!
Installing the Arduino_MFRC522v2 Library
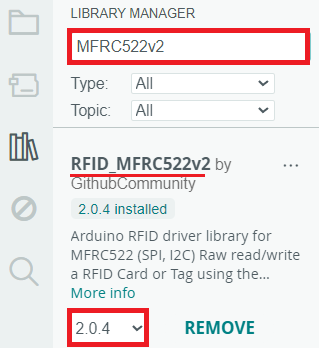
For this tutorial, we’ll use the MFRC522v2.h library to control the RFID reader. In the Arduino IDE, go to Sketch > Include Library > Manage Libraries or click on the Library Manager icon at the left sidebar.
Search for MFRC522v2 and install the library by GithubCommunity.
MFRC522 RFID Reader/Writer Pinout and Wiring to the ESP32
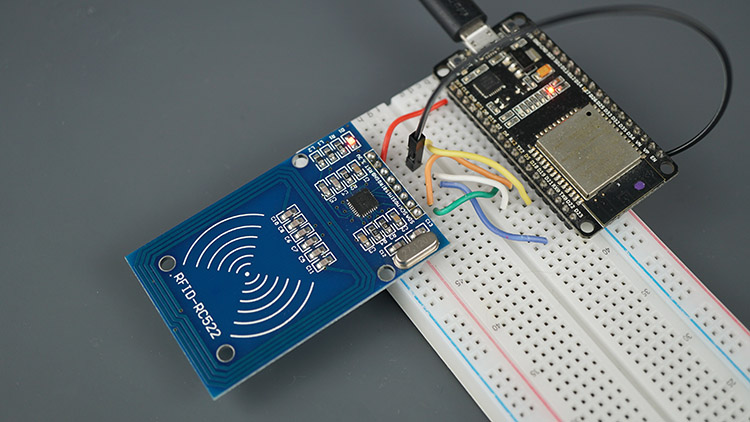
We’ll connect the MFRC522 RFID Reader using the ESP32 default SPI pins. You can use the following table.
| MFRC522 RFID Reader | ESP32 | Description |
|---|---|---|
| SDA | GPIO 5 | SPI signal input, I2C data line, or UART data input |
| SCK | GPIO 18 | SPI clock |
| MOSI | GPIO 23 | SPI data input |
| MISO | GPIO 19 | SPI master-in-slave-out, I2C serial clock, or UART serial output |
| IRQ | Don’t connect | Interrupt pin; signals the microcontroller when an RFID tag is nearby |
| GND | GND | |
| RST | GPIO 21 | LOW signal to put the module in power-down mode; send a HIGH signal to reset the module |
| 3.3V | 3.3V | Power supply (2.5-3.3V) |
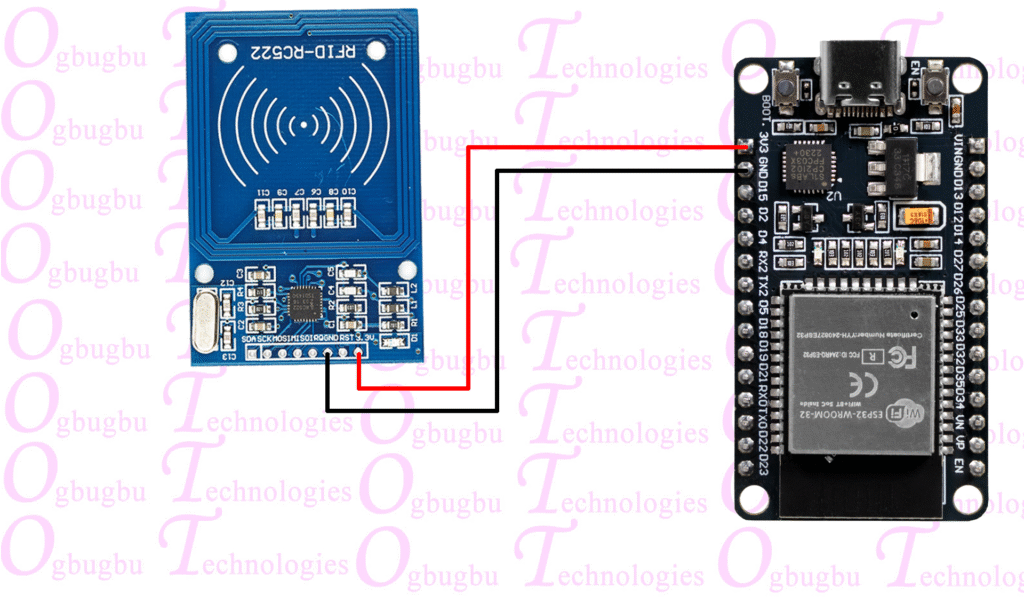
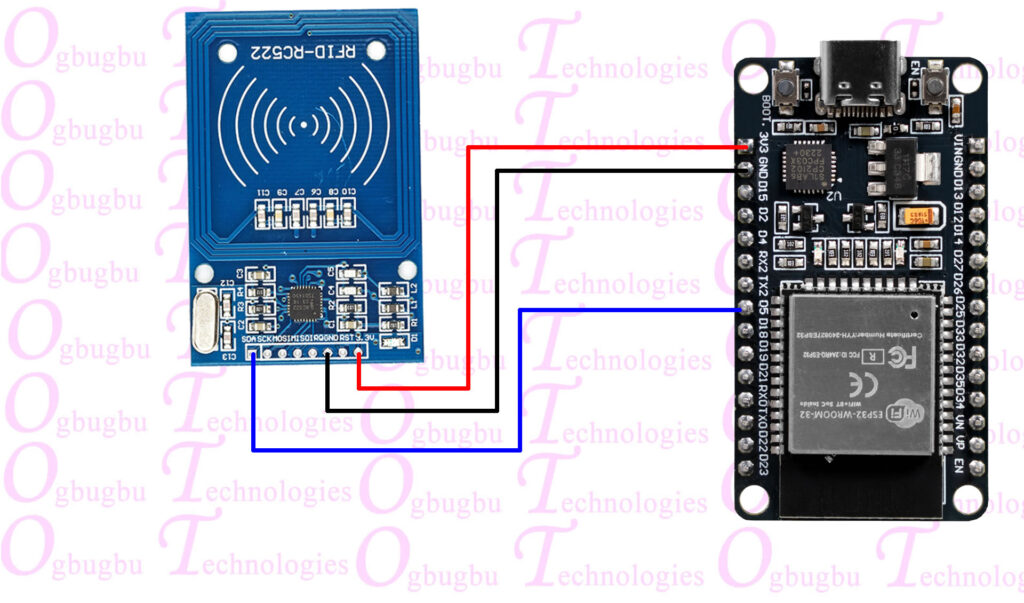
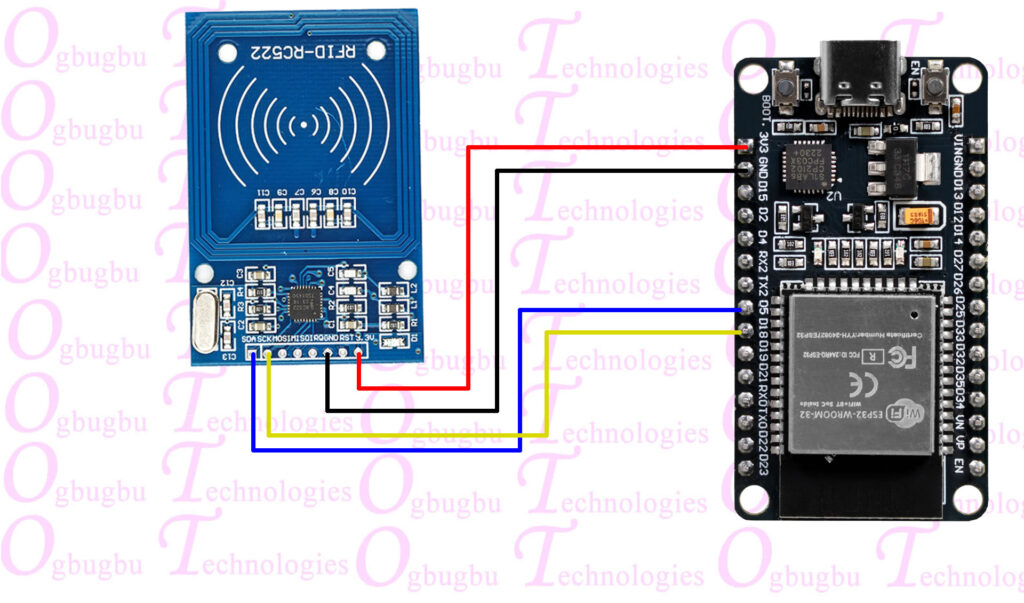
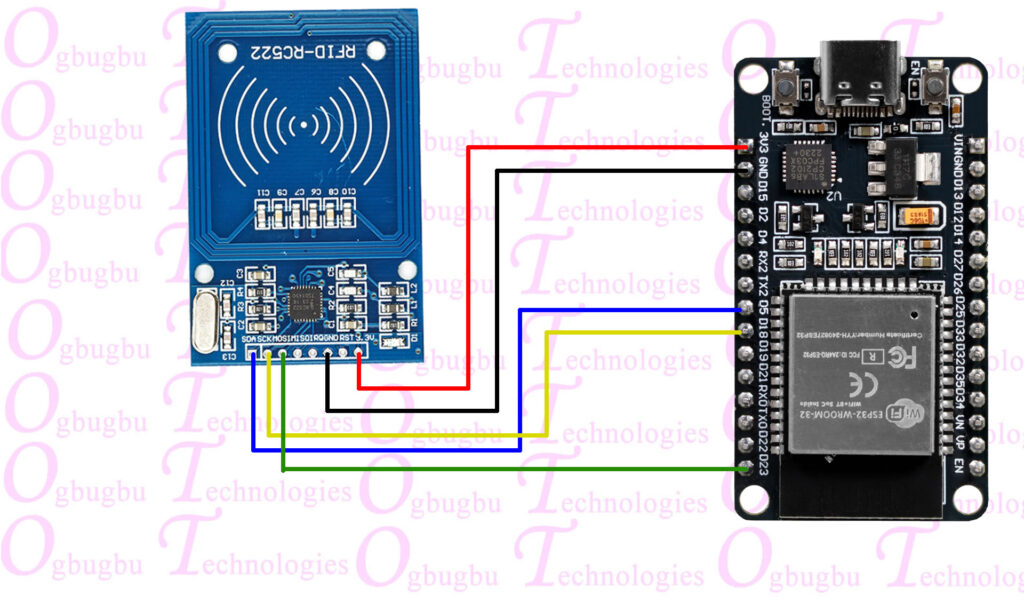
ESP32 CONNECTION WITH RFID CARD READER
ESP32 GND TO RFID CARD READER GND
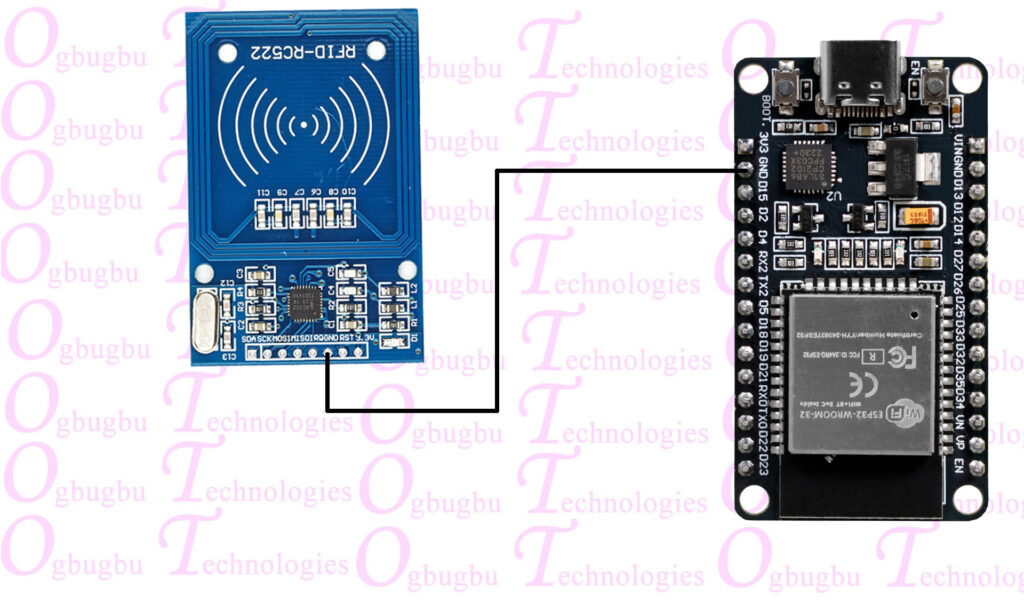
ESP32 3.3V VCC TO RFID CARD READER VCC
ESP32 D5 VCC TO RFID CARD READER SDA
ESP32 D18 TO RFID CARD READER SCK
ESP32 D23 TO RFID CARD READER MOSI
ESP32 D19 TO RFID CARD READER MISO
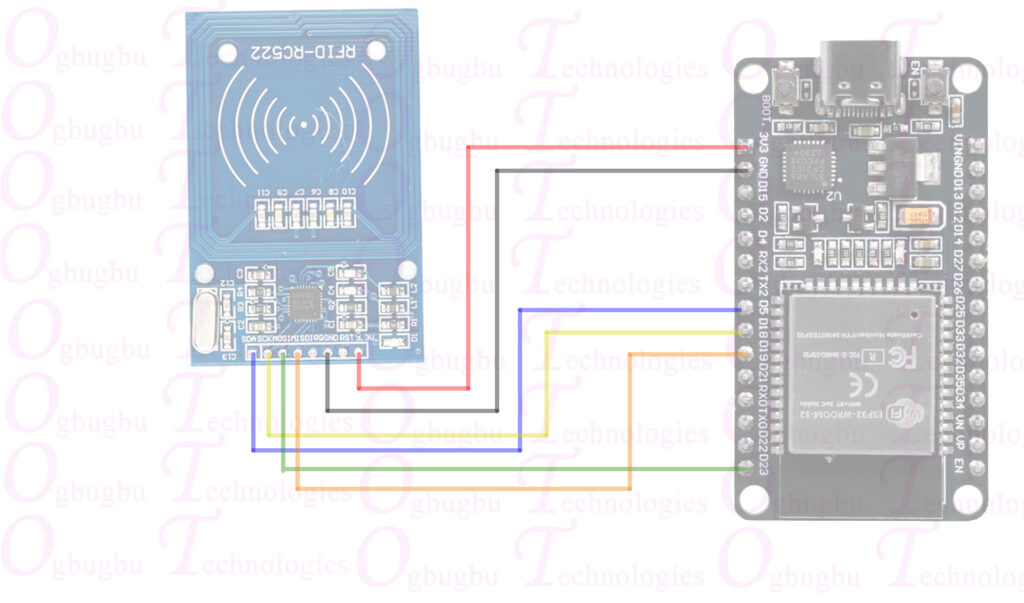
ESP32 D21 TO RFID CARD READER RST
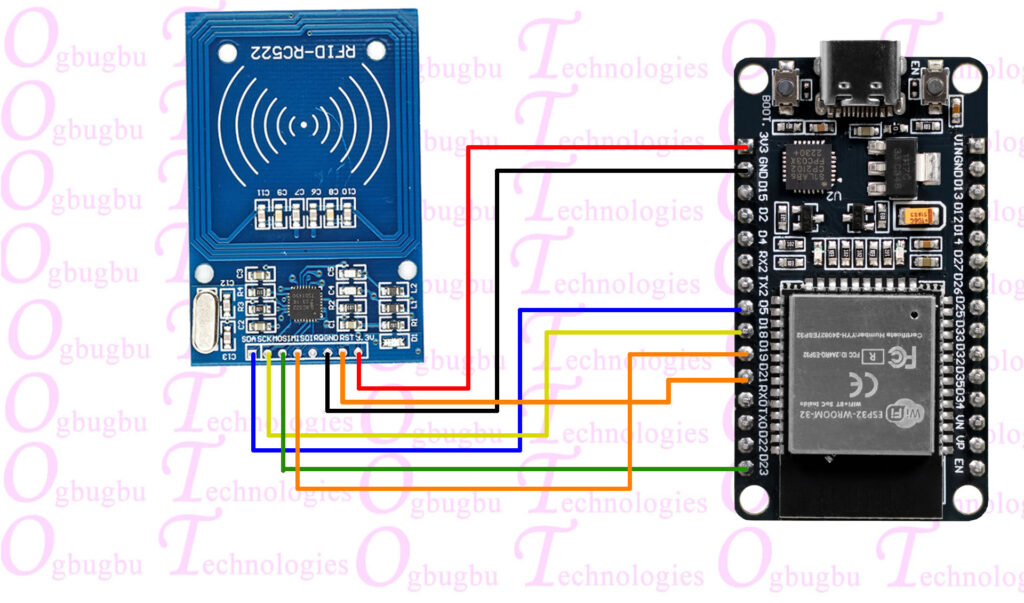
Note: this library is also compatible with the ESP8266, Arduino, and other boards. If you are using a different board, you can check the recommended library pin assigment.
Read RFID Card Raw Data – Code
The following example reads raw data from the RFID tag. With this example, you’ll better understand how data is stored on the MIFARE 1K tags.
#include <MFRC522v2.h>
#include <MFRC522DriverSPI.h>
//#include <MFRC522DriverI2C.h>
#include <MFRC522DriverPinSimple.h>
#include <MFRC522Debug.h>

// Learn more about using SPI/I2C or check the pin assigment for your board: https://github.com/OSSLibraries/Arduino_MFRC522v2#pin-layout
MFRC522DriverPinSimple ss_pin(5);

MFRC522DriverSPI driver{ss_pin}; // Create SPI driver
//MFRC522DriverI2C driver{};     // Create I2C driver
MFRC522 mfrc522{driver};         // Create MFRC522 instance

void setup() {
  Serial.begin(115200);  // Initialize serial communication
  while (!Serial);       // Do nothing if no serial port is opened (added for Arduinos based on ATMEGA32U4).

  mfrc522.PCD_Init();    // Init MFRC522 board.
  MFRC522Debug::PCD_DumpVersionToSerial(mfrc522, Serial);	// Show details of PCD - MFRC522 Card Reader details.
  Serial.println(F("Scan PICC to see UID, SAK, type, and data blocks..."));
}

void loop() {
  // Reset the loop if no new card present on the sensor/reader. This saves the entire process when idle.
  if (!mfrc522.PICC_IsNewCardPresent()) {
    return;
  }

  // Select one of the cards.
  if (!mfrc522.PICC_ReadCardSerial()) {
    return;
  }

  // Dump debug info about the card; PICC_HaltA() is automatically called.
  MFRC522Debug::PICC_DumpToSerial(mfrc522, Serial, &(mfrc522.uid));

  delay(2000);
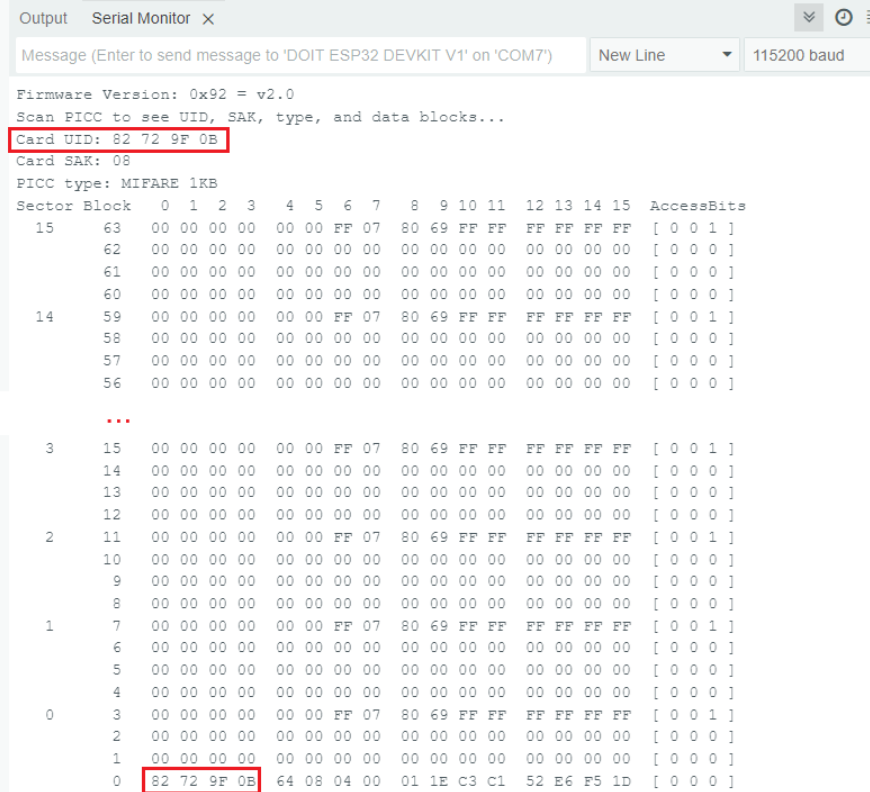
}This displays the card UID, the tag type, and the memory blocks. The tag is of type MIFARE with 1KB of memory.
Read the RFID Card UID – Code Only
The following example only reads the UID of the RFID tag. This can be useful if you just want to identify the card without caring about the rest of the stored data.
#include <MFRC522v2.h>
#include <MFRC522DriverSPI.h>
//#include <MFRC522DriverI2C.h>
#include <MFRC522DriverPinSimple.h>
#include <MFRC522Debug.h>

// Learn more about using SPI/I2C or check the pin assigment for your board: https://github.com/OSSLibraries/Arduino_MFRC522v2#pin-layout
MFRC522DriverPinSimple ss_pin(5);

MFRC522DriverSPI driver{ss_pin}; // Create SPI driver
//MFRC522DriverI2C driver{};     // Create I2C driver
MFRC522 mfrc522{driver};         // Create MFRC522 instance

void setup() {
  Serial.begin(115200);  // Initialize serial communication
  while (!Serial);       // Do nothing if no serial port is opened (added for Arduinos based on ATMEGA32U4).

  mfrc522.PCD_Init();    // Init MFRC522 board.
  MFRC522Debug::PCD_DumpVersionToSerial(mfrc522, Serial);	// Show details of PCD - MFRC522 Card Reader details.
	Serial.println(F("Scan PICC to see UID"));
}

void loop() {
	// Reset the loop if no new card present on the sensor/reader. This saves the entire process when idle.
	if (!mfrc522.PICC_IsNewCardPresent()) {
		return;
	}

	// Select one of the cards.
	if (!mfrc522.PICC_ReadCardSerial()) {
		return;
	}

  Serial.print("Card UID: ");
  MFRC522Debug::PrintUID(Serial, (mfrc522.uid));
  Serial.println();

  // Save the UID on a String variable
  String uidString = "";
  for (byte i = 0; i < mfrc522.uid.size; i++) {
    if (mfrc522.uid.uidByte[i] < 0x10) {
      uidString += "0";
    }
    uidString += String(mfrc522.uid.uidByte[i], HEX);
  }
  Serial.println(uidString);
}How the Output Looks Like


