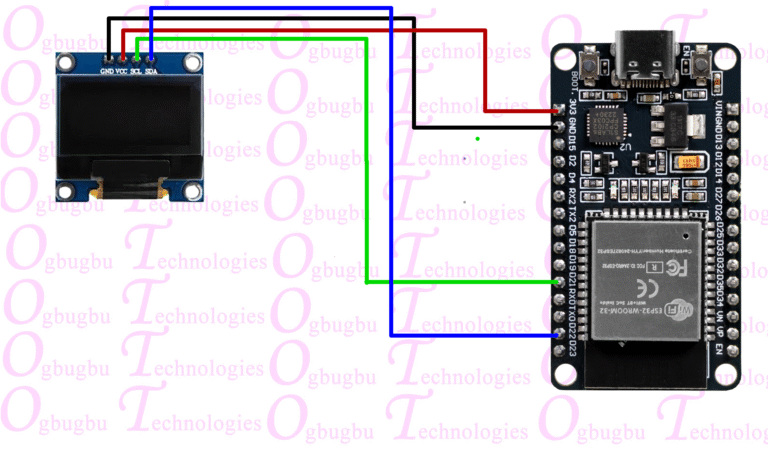
Having everything connected over WiFi is great, all the information directly on your phone, tablet or laptop is incredibly powerful but sometimes you just want some information at a glance without having to pull out your phone to check.
Enter these mini OLED displays which feature an SSD1306 driver and are incredibly useful for displaying information at a glance. These 1 inch displays are super compact, cheap, require only 4 wires using the i2c protocol and because they are OLED there is no backlight and aren’t an eyesore in a dark environment.
Today I will show you how to wire an SSD1306 OLED display, add it to any existing project and we will cover some coding examples.
Video
Parts list
There are very little parts we need for this build, just 2 in fact, and one of them being one you probably already have:
- 1.3/0.96″ OLED Display – They are available in different colours, I prefer the white one myself as well as different sizes. They feature an SSD1306 OLED display driver with an easy to work with library.
- ESP8266 or any similar board that supports i2c.
Hardware wiring
The problem with some displays is that they can require a lot of wires to drive – that isn’t a problem here. Just 4 wires are required for these displays, VCC, ground, SDA and SCL.
The first thing we need to find is our boards i2c pins (SDA and SCL). To do this, find the pinout for your specific boards and find the SDA and SCL pins. A couple of common ones are:
| Board | Pin |
| Arduino Uno | SDA and SCL Pins |
| Arduino Nano | A4 (SDA) and A5 (SCL) |
| Arduino Mega | D20 (SDA) and D21 (SCL) |
| ESP8266 NodeMCU | D20 (SDA) and D21 (SCL) |
| ESP8266 Wemos D1 Mini | D2 – GPIO4 (SDA) and D1 – GPIO5 (SCL) |
| ESP32 | GPIO21 (SDA) and GPIO22 (SCL) |
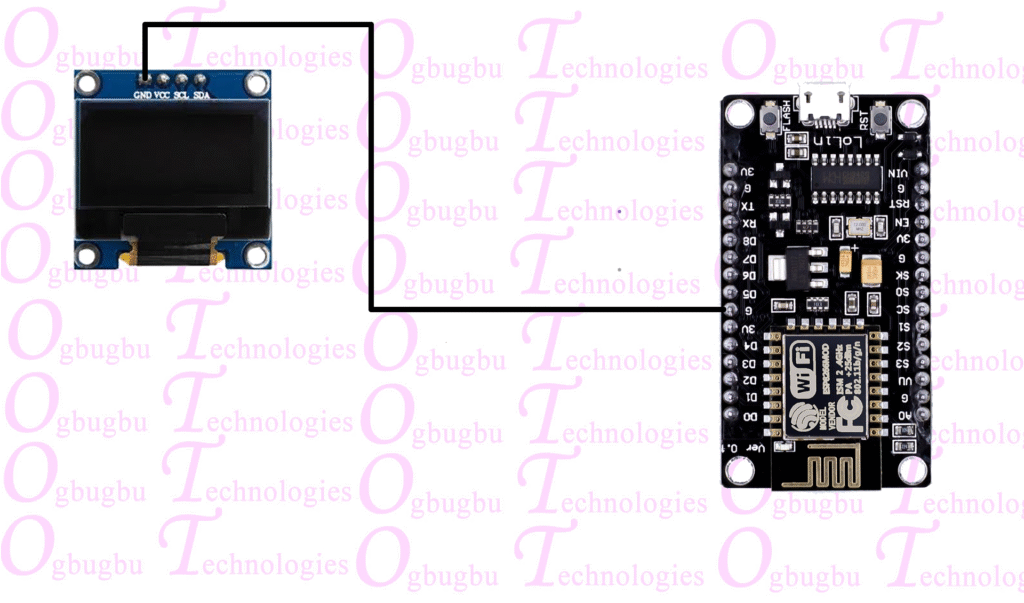
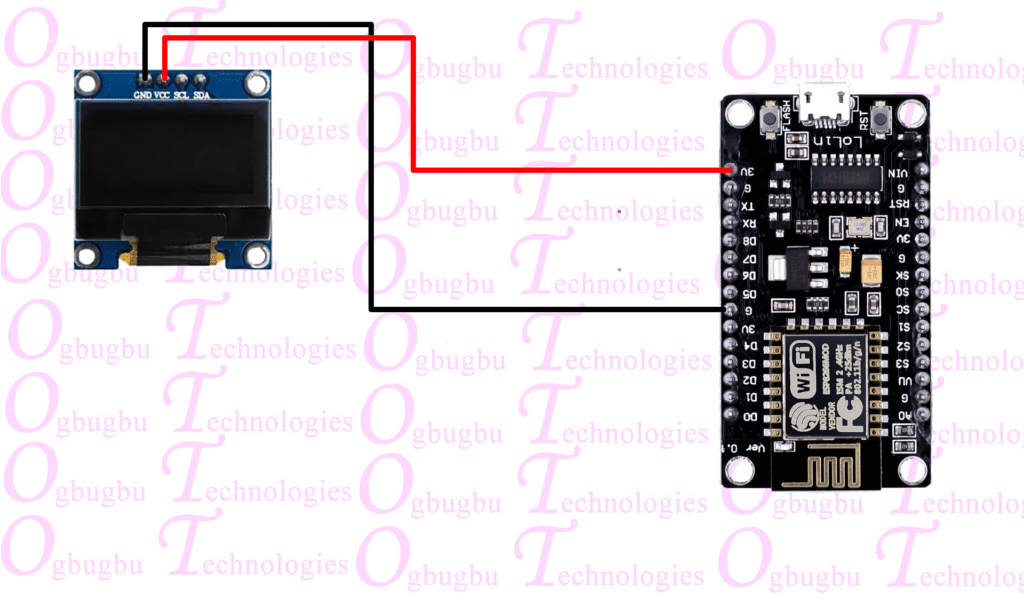
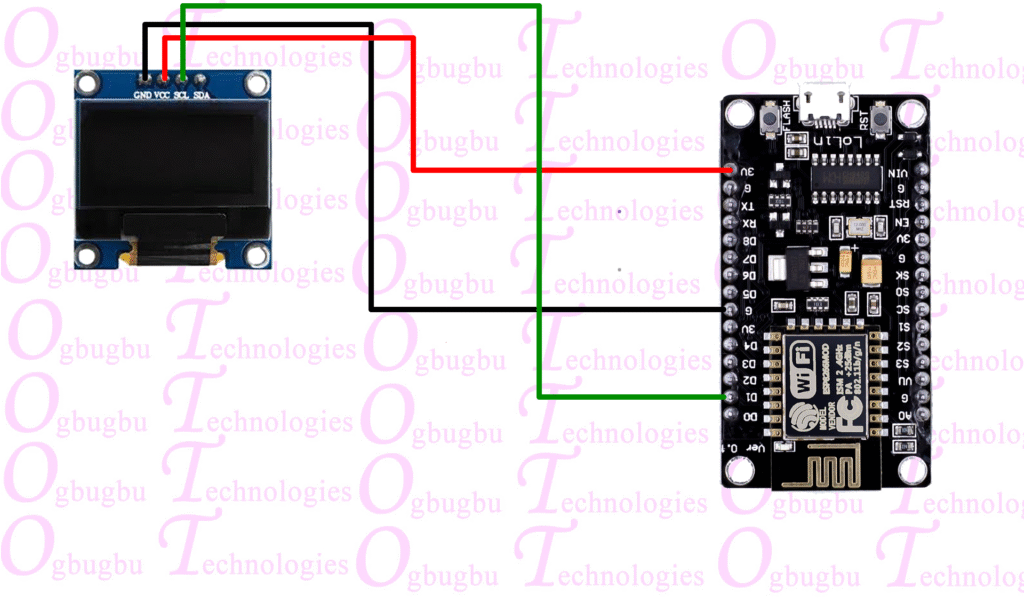
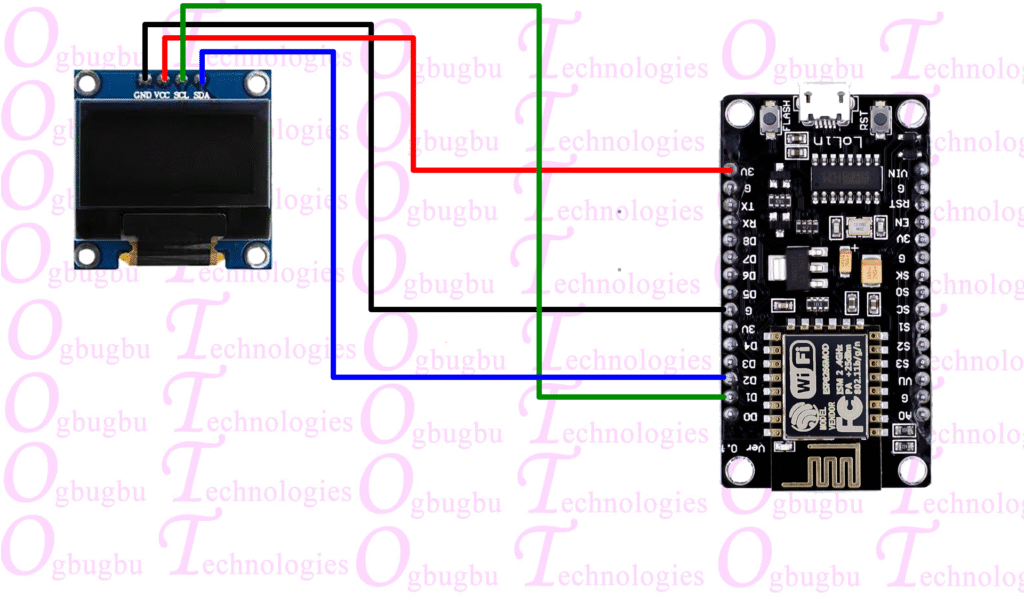
Next its simple a case of wiring everything just like this, note that these displays can operate from 3.3v to 5v but double check your exact model:
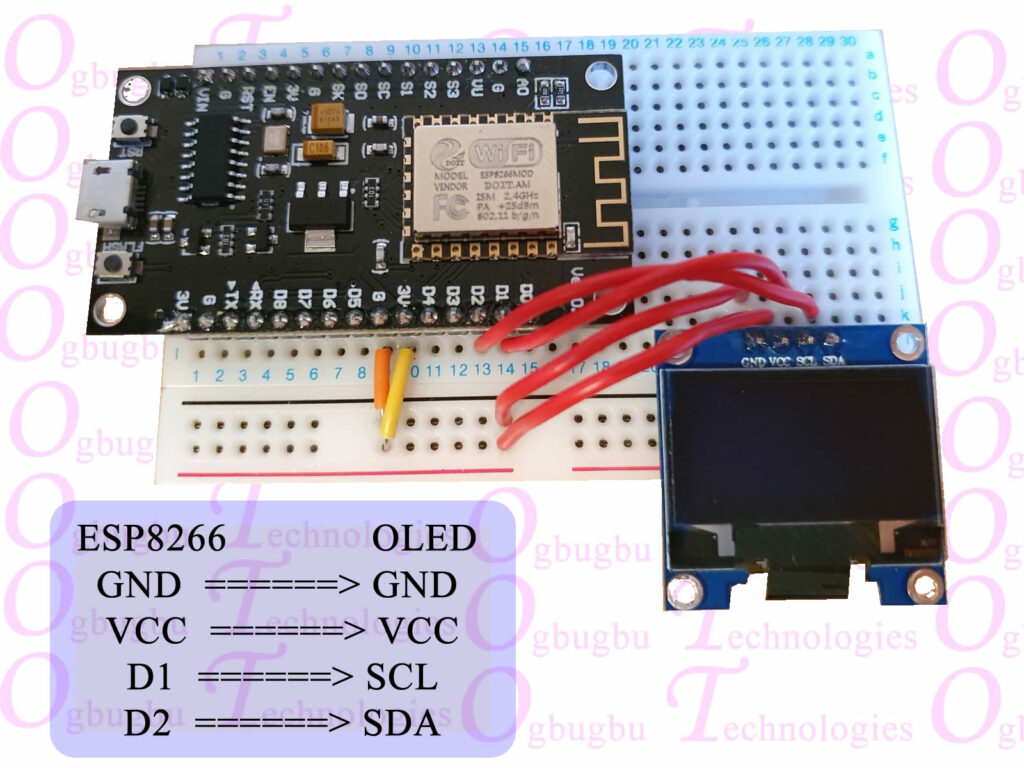
Step by Step Connection
ESP8266 GND to OLED GND
ESP8266 VCC to OLED VCC
ESP8266 D1 to OLED SCL
ESP8266 D2 to OLED SDA
Installing the Adafruit Libraries
Go back to Tools > Manage Libraries, search for “Adafruit SSD1306” and hit install. You may receive a message stating that this library has dependencies and asking if you want to install them also. Hit yes. If you do not get the message, search for “Adafruit GFX Library” and “Adafruit BusIO” and make sure to install them too.
There are other libraries that work with the SSD1306 OLED display but I found the Adafruit one works really well for the basics.
Let’s firstly test out our display is working and wired correctly by loading the Adafruit example.
Testing the display
Head to File > Examples > Adafruit SSD1306 > ssd1306_128x64_i2c (choose the size suitable to your display). Once loaded, it should look like this:
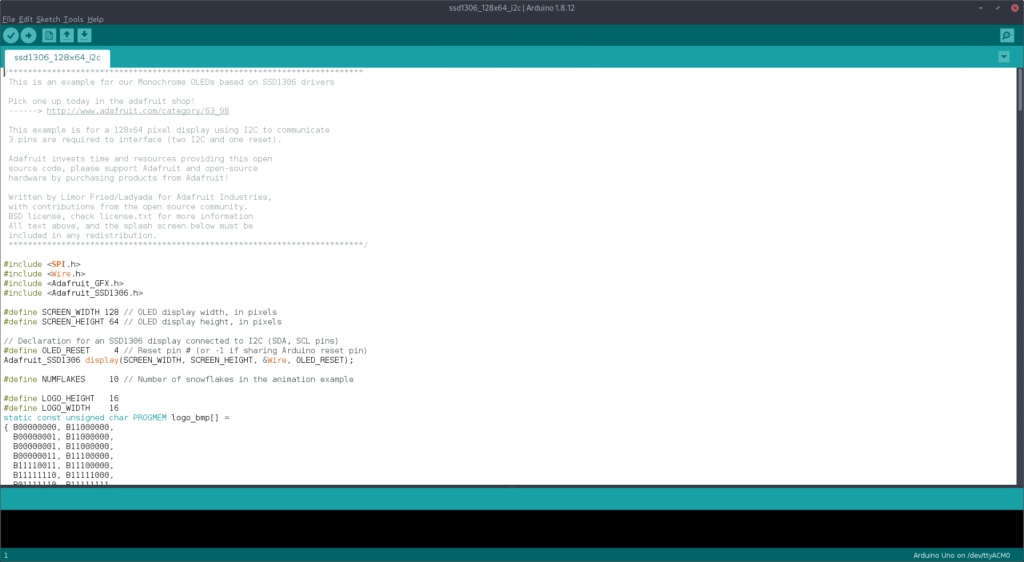
If you were to load this example, you would probably (unless you got lucky) find that nothing would happen. That’s because we need to change the address that we discovered earlier. Head down to this section in the code:
if(!display.begin(SSD1306_SWITCHCAPVCC, 0x3D)) { // Address 0x3D for 128x64
    Serial.println(F("SSD1306 allocation failed"));
    for(;;); // Don't proceed, loop forever
  }
Notice the “0x3D” as the address, change this to the address you discovered earlier, so I would change mine to 0x3C.
You will also want to change this line:
#define OLED_RESET 4To this:
#define OLED_RESET -1Go ahead and then upload.
If everything works correctly, you should now see your display slowly go through and play through different animations and text, like this:
Upload this Code
#include <SPI.h>
#include <Wire.h>
#include <Adafruit_GFX.h>
#include <Adafruit_SSD1306.h>

#define SCREEN_WIDTH 128 // OLED display width, in pixels
#define SCREEN_HEIGHT 64 // OLED display height, in pixels

// Declaration for an SSD1306 display connected to I2C (SDA, SCL pins)
#define OLED_RESET     -1 // Reset pin # (or -1 if sharing Arduino reset pin)
Adafruit_SSD1306 display(SCREEN_WIDTH, SCREEN_HEIGHT, &Wire, OLED_RESET);

void setup() {
  Serial.begin(9600);

  // SSD1306_SWITCHCAPVCC = generate display voltage from 3.3V internally
  if(!display.begin(SSD1306_SWITCHCAPVCC, 0x3C)) { // Address 0x3D for 128x64
    Serial.println(F("SSD1306 allocation failed"));
    for(;;); // Don't proceed, loop forever
  }

  // Clear the buffer
  display.clearDisplay();
  display.display();

}

void loop() {

  float mainTemp = random(18, 25);
  float decimalTemp = random(0,99) / 100.0;
  float temp = mainTemp + decimalTemp;
  displayTemp(temp);
  delay(2000);

}

void displayTemp(float temp) {
  display.clearDisplay();
  display.display();

  display.setTextSize(1);
  display.setTextColor(SSD1306_WHITE);
  display.setCursor(0,0);
  display.println("Kitchen Temperature");
  display.println("---------------------");
  display.setCursor(28,27);
  display.setTextSize(3);
  display.print(temp, 1);
  display.print((char)247);
  display.display();
}