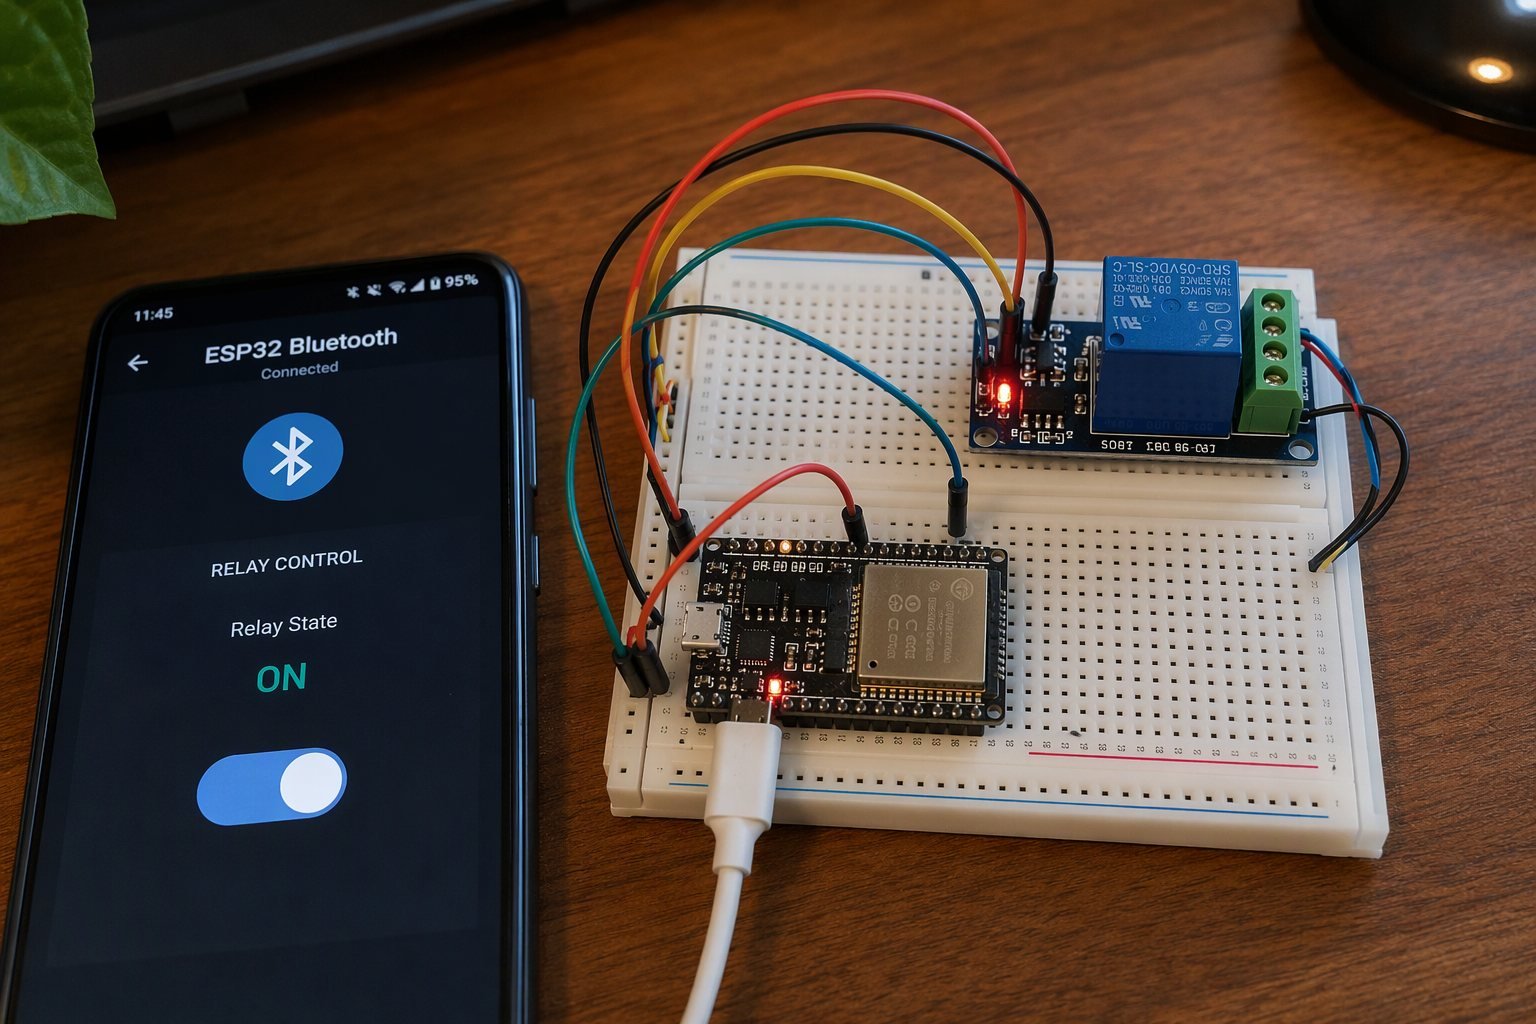
Wi-Fi isn’t the only radio inside the ESP32, it also speaks Bluetooth Low Energy. BLE control has one big advantage over a web server: it works with no router and no internet, perfect for a garage, farm gate or campsite. In this project you’ll expose a BLE “switch” characteristic from the ESP32 and toggle a relay from a free phone app such as nRF Connect or a simple BLE dashboard app.
Safety first: relays can switch mains voltage. Until you’re confident with AC wiring, switch a 12V LED strip or computer fan instead. Keep all mains joints inside an insulated enclosure.
Components Required
- ESP32 DevKit
- Single-channel 5V relay module (opto-isolated, active-LOW type is common)
- Load: 12V LED strip, fan or lamp
- Breadboard and jumper wires
Circuit Diagram and Wiring

| GND | Relay | GND | Black |
The Code (Arduino IDE with ESP32 core)
/*
 * ESP32 BLE Relay Switch
 * Ogbugbu Technologies - ogbugbu-technologies.com.ng/
 * No extra libraries - BLE ships with the ESP32 core
 */
#include <BLEDevice.h>
#include <BLEServer.h>
#include <BLEUtils.h>

#define RELAY_PIN 26
#define RELAY_ACTIVE_LOW true   // most blue relay boards trigger on LOW

#define SERVICE_UUID        "4fafc201-1fb5-459e-8fcc-c5c9c331914b"
#define SWITCH_CHAR_UUID    "beb5483e-36e1-4688-b7f5-ea07361b26a8"

void relayWrite(bool on) {
  if (RELAY_ACTIVE_LOW) digitalWrite(RELAY_PIN, on ? LOW : HIGH);
  else                  digitalWrite(RELAY_PIN, on ? HIGH : LOW);
}

class SwitchCallback : public BLECharacteristicCallbacks {
  void onWrite(BLECharacteristic *c) override {
    String v = c->getValue();
    if (v == "1") { relayWrite(true);  Serial.println("Relay ON"); }
    if (v == "0") { relayWrite(false); Serial.println("Relay OFF"); }
  }
};

void setup() {
  Serial.begin(115200);
  pinMode(RELAY_PIN, OUTPUT);
  relayWrite(false);

  BLEDevice::init("Ogbugbu-Switch");          // name shown in phone apps
  BLEServer *server = BLEDevice::createServer();
  BLEService *service = server->createService(SERVICE_UUID);
  BLECharacteristic *ch = service->createCharacteristic(
      SWITCH_CHAR_UUID,
      BLECharacteristic::PROPERTY_READ | BLECharacteristic::PROPERTY_WRITE);
  ch->setCallbacks(new SwitchCallback());
  ch->setValue("0");
  service->start();

  BLEAdvertising *adv = BLEDevice::getAdvertising();
  adv->addServiceUUID(SERVICE_UUID);
  adv->start();
  Serial.println("BLE switch advertising as 'Ogbugbu-Switch'");
}

void loop() {
  delay(1000);   // everything happens in BLE callbacks
}
How the Code Works
BLE organises features into services and characteristics, each identified by a UUID. This sketch creates one service with one read/write characteristic that accepts “1” or “0”. Writing to it from the phone fires the onWrite() callback, which flips the relay. Because many blue relay boards are active-LOW, the RELAY_ACTIVE_LOW flag lets you adapt without rewiring.
To control it, install nRF Connect (free), scan for “Ogbugbu-Switch”, connect, open the service, and write 31 (ASCII “1”) to the characteristic to switch the relay on. The same characteristic can be bound to a toggle widget in apps like “BLE Remote” for a friendlier interface. The two UUIDs are unique identifiers, keep them as-is, or generate your own with an online UUID generator.
Testing and Troubleshooting
If the relay clicks as soon as the board powers up, your module is active-LOW and booting with the pin floating, set the pin HIGH before pinMode(OUTPUT), or use a module with a JD-VCC jumper for full opto-isolation. If the phone can’t see the device, confirm Bluetooth is on and the sketch printed the advertising message. BLE range is typically 10–20 m indoors.
Conclusion
You now own a phone-controlled power switch that works anywhere, no internet required. Add a second characteristic for a status LED, protect the write with a PIN check, or combine it with a current sensor for a smart-energy monitor.
Found this tutorial helpful? Share it with a fellow maker and check out more builds on Ogbugbu Technologies!