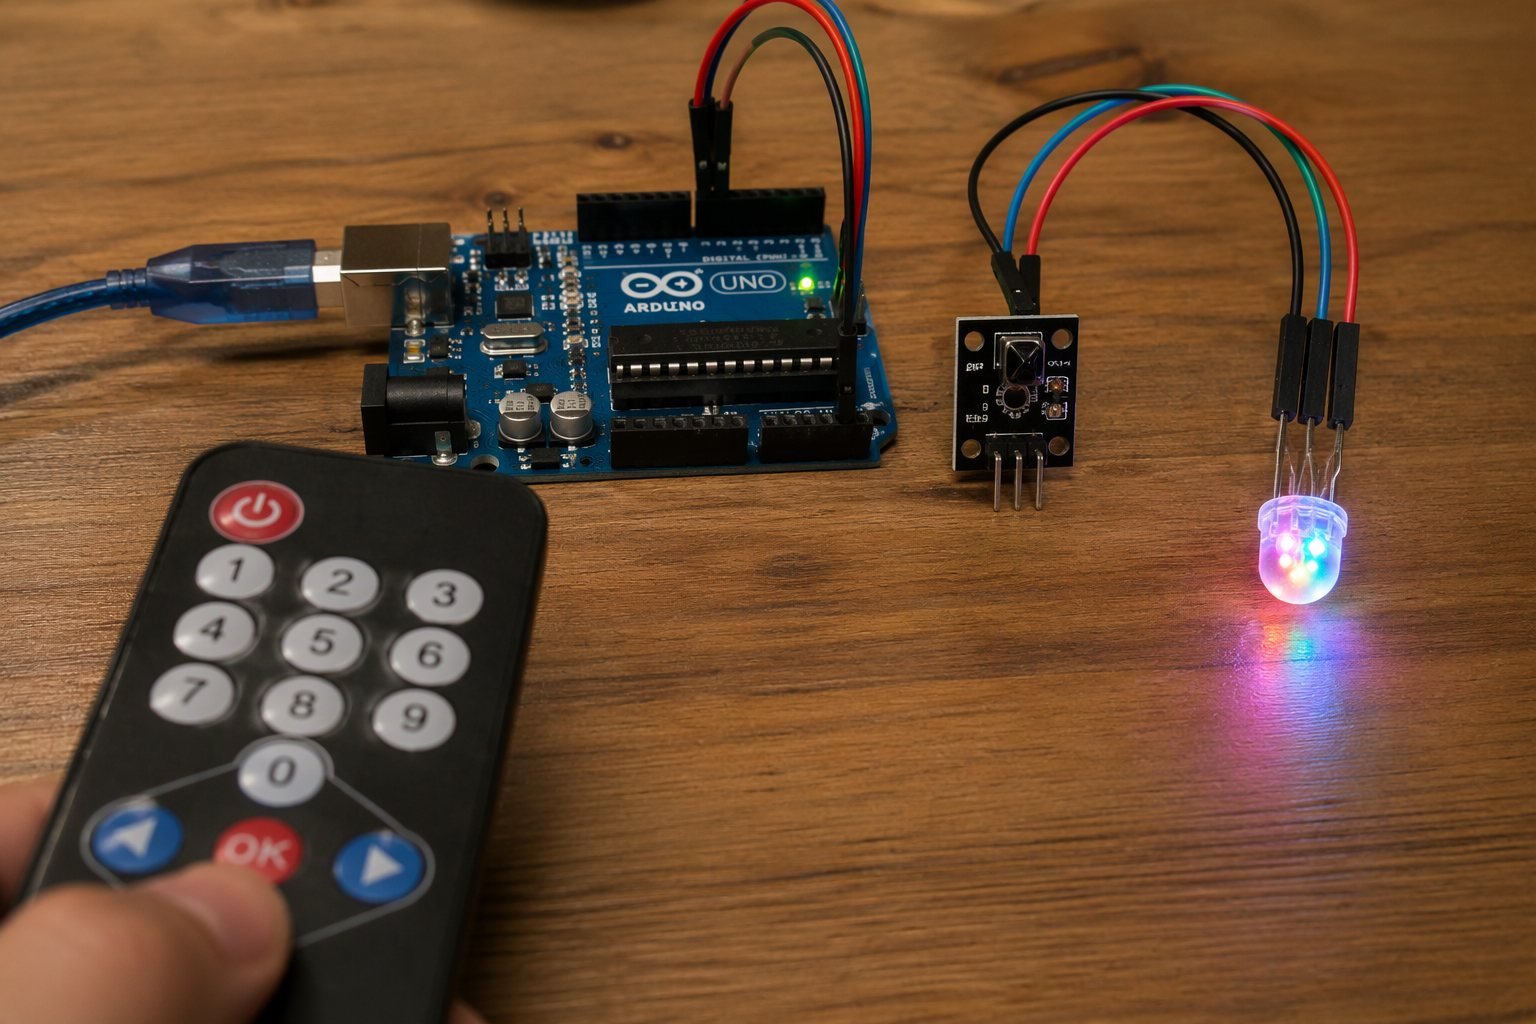
That old TV remote in your drawer is actually a free wireless keypad. In this project you’ll connect a VS1838B infrared receiver to an Arduino and use remote buttons to change the colour of an RGB LED, red, green, blue, white, and everything in between. No app, no Wi-Fi, just infrared.
You’ll use the popular IRremote library to decode the signals, learn how to find the codes of your own remote, and drive the three channels of a common-cathode RGB LED with PWM.
Components Required
- Arduino Uno (or Nano)
- VS1838B / HX1838 IR receiver module
- Common-cathode RGB LED
- 3 × 220Ω resistors
- Any IR remote control
- Breadboard and jumper wires
Circuit Diagram and Wiring
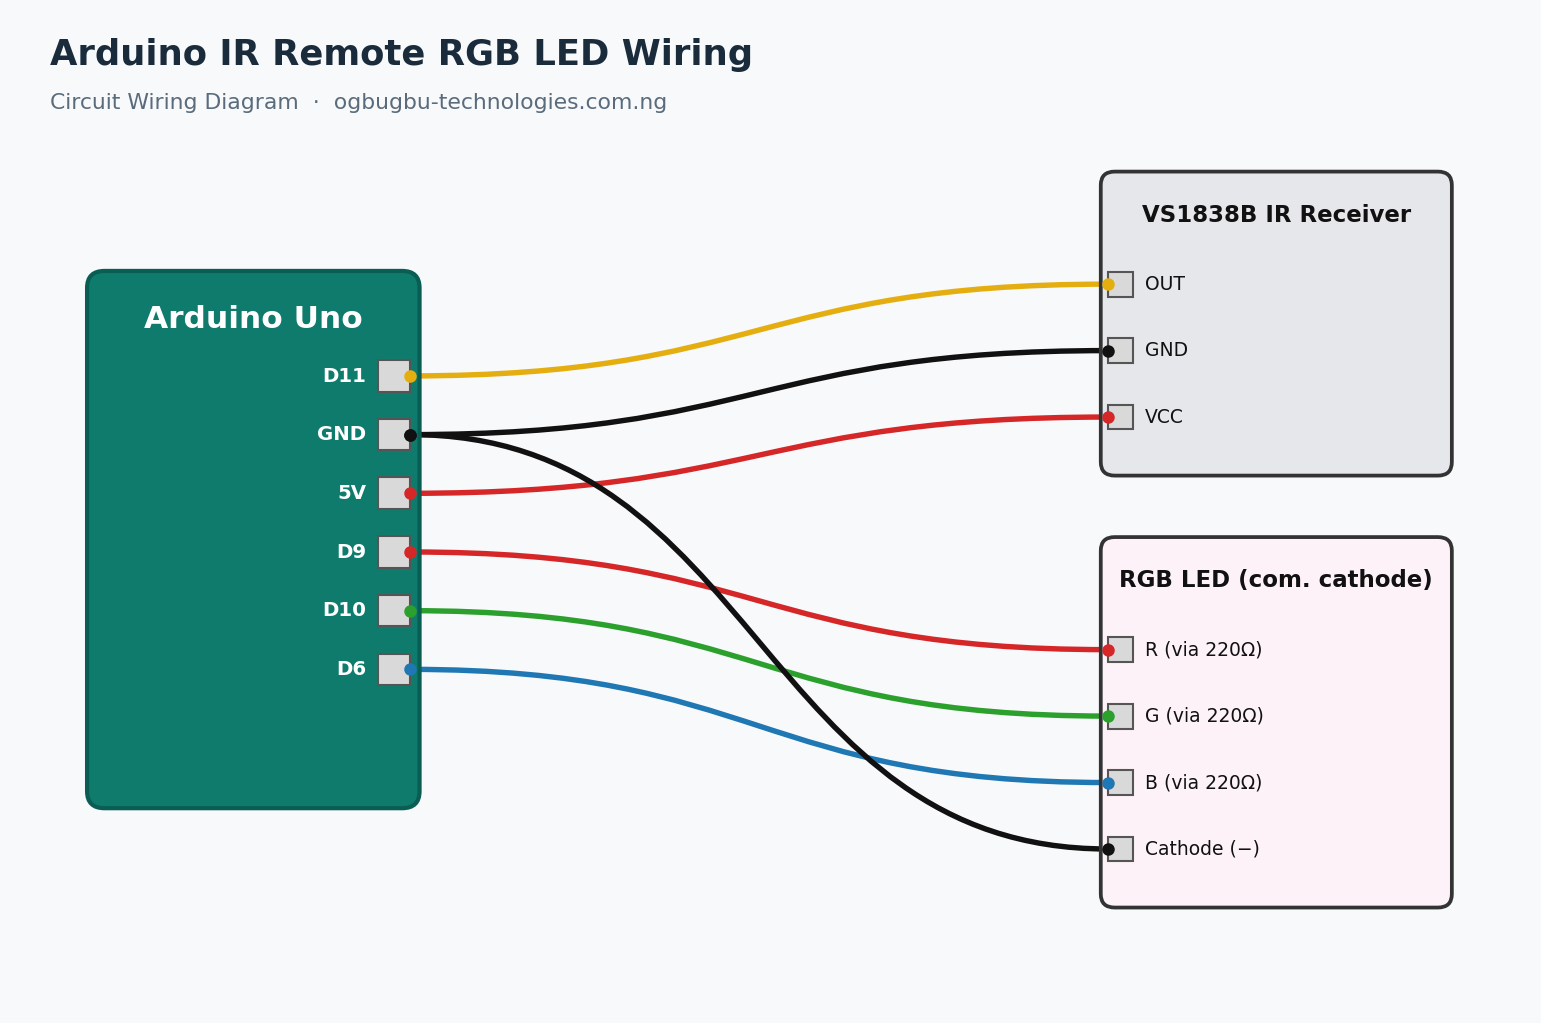
Arduino PinComponent PinWire Color (diagram)D11IR receiver OUTYellowGNDIR receiver GNDBlack5VIR receiver VCCRedD9RGB red leg via 220ΩRedD10RGB green leg via 220ΩGreenD6RGB blue leg via 220ΩBlueGNDRGB cathode (longest leg)Black
The Code (Arduino IDE)
/*
 * Arduino IR Remote-Controlled RGB LED
 * Ogbugbu Technologies - ogbugbu-technologies.com.ng/
 * Library: "IRremote" by Armin Joachimsmeyer (v3.x+)
 */
#include <IRremote.h>

#define IR_PIN 11
#define RED_PIN 9
#define GREEN_PIN 10
#define BLUE_PIN 6

// Replace these with YOUR remote's codes (run the decoder first)
#define CODE_RED    0xFF30CF   // button 1
#define CODE_GREEN  0xFF18E7   // button 2
#define CODE_BLUE   0xFF7A85   // button 3
#define CODE_WHITE  0xFF10EF   // button 4
#define CODE_OFF    0xFF38C7   // button 5

void setColor(int r, int g, int b) {
  analogWrite(RED_PIN, r);
  analogWrite(GREEN_PIN, g);
  analogWrite(BLUE_PIN, b);
}

void setup() {
  Serial.begin(9600);
  IrReceiver.begin(IR_PIN, ENABLE_LED_FEEDBACK);
  pinMode(RED_PIN, OUTPUT);
  pinMode(GREEN_PIN, OUTPUT);
  pinMode(BLUE_PIN, OUTPUT);
  setColor(0, 0, 0);
  Serial.println("Point your remote and press a button...");
}

void loop() {
  if (IrReceiver.decode()) {
    unsigned long code = IrReceiver.decodedIRData.decodedRawData;
    Serial.print("Received code: 0x");
    Serial.println(code, HEX);

    if (code == CODE_RED)        setColor(255, 0, 0);
    else if (code == CODE_GREEN) setColor(0, 255, 0);
    else if (code == CODE_BLUE)  setColor(0, 0, 255);
    else if (code == CODE_WHITE) setColor(255, 255, 255);
    else if (code == CODE_OFF)   setColor(0, 0, 0);

    IrReceiver.resume();   // ready for the next press
  }
}
How the Code Works
The VS1838B does the hard work of demodulating the 38 kHz infrared carrier and outputs a clean digital stream. The IRremote library decodes that stream into a command code. Because every remote sends different codes, the sketch prints every received code to the Serial Monitor: upload it once, press your chosen buttons, copy the hex values into the #define lines and upload again. This two-pass approach works with literally any NEC-protocol remote.
Colour mixing happens through analogWrite() on three PWM pins. setColor(255, 0, 0) lights only the red die; setColor(255, 255, 255) mixes white. Try setColor(255, 80, 0) for a warm orange, or setColor(148, 0, 211) for violet. The IrReceiver.resume() call is essential, without it the receiver stays locked on the first code forever.
Testing and Troubleshooting
If nothing prints when you press buttons, check the receiver pinout (OUT/GND/VCC order varies between modules, check the silkscreen) and make sure the remote’s battery is fresh; a phone camera pointed at the remote’s IR LED will show a purple flicker when it transmits. If codes repeat as 0xFFFFFFFF, that’s the NEC repeat code: ignore it or use it to implement a hold-to-dim feature.
Conclusion
Infrared control is ideal for lamps, fans and displays where Wi-Fi would be overkill. Extend this project with fade transitions between colours, brightness up/down buttons, or a power button that remembers the last colour.
Found this tutorial helpful? Share it with a fellow maker and check out more builds on Ogbugbu Technologies!