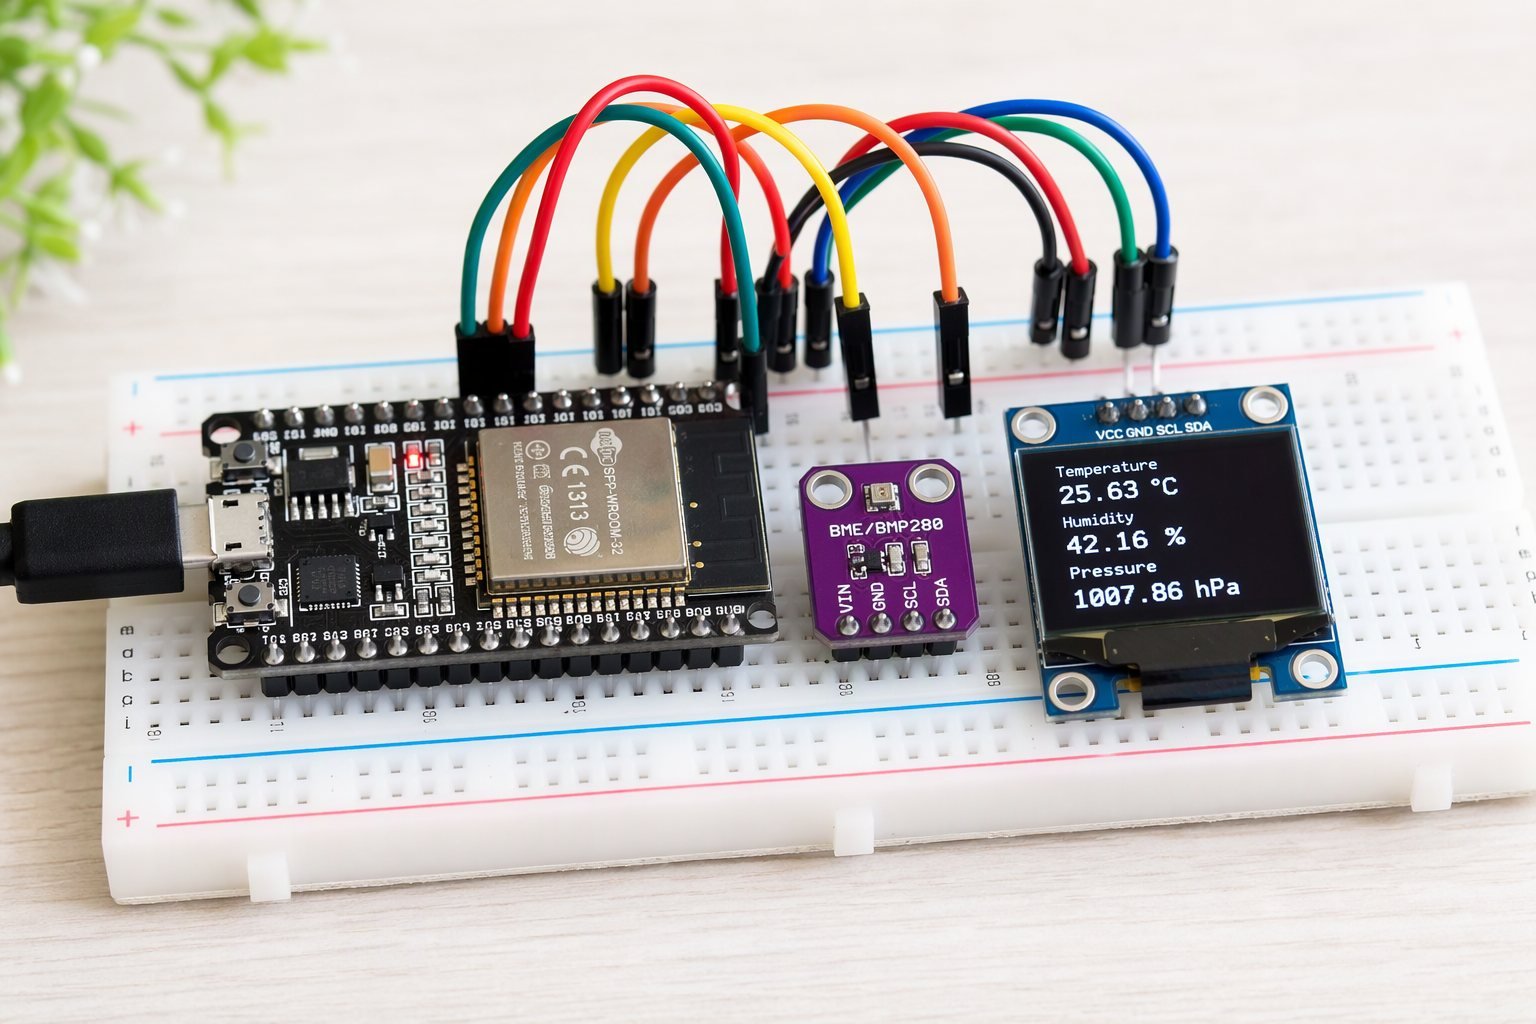
A real weather station measures temperature, humidity and barometric pressure, and the tiny BME280 does all three on a single I2C bus. In this project the ESP32 reads the BME280 every two seconds and shows the three values on a 0.96″ OLED. Both devices share the same two I2C wires because they’ve different bus addresses (0x76 for the sensor, 0x3C for the display).
Pressure is the secret weapon of this build: a falling pressure trend predicts rain hours before the sky changes, something a temperature-only station can never tell you.
Components Required
- ESP32 DevKit
- BME280 sensor module (I2C version)
- 0.96″ SSD1306 OLED display (I2C, 128×64)
- Breadboard and jumper wires
Circuit Diagram and Wiring

| GPIO22 | OLED |
The Code (Arduino IDE with ESP32 core)
/*
 * ESP32 BME280 + OLED Weather Station
 * Ogbugbu Technologies - ogbugbu-technologies.com.ng/
 * Libraries: "Adafruit BME280", "Adafruit SSD1306", "Adafruit Unified Sensor"
 */
#include <Wire.h>
#include <Adafruit_Sensor.h>
#include <Adafruit_BME280.h>
#include <Adafruit_GFX.h>
#include <Adafruit_SSD1306.h>

#define SCREEN_WIDTH 128
#define SCREEN_HEIGHT 64

Adafruit_BME280 bme;
Adafruit_SSD1306 display(SCREEN_WIDTH, SCREEN_HEIGHT, &Wire, -1);

void setup() {
  Serial.begin(115200);
  Wire.begin(21, 22);                 // ESP32 default I2C pins

  if (!bme.begin(0x76)) {             // try 0x77 if this fails
    Serial.println("BME280 not found!");
    while (1);
  }
  if (!display.begin(SSD1306_SWITCHCAPVCC, 0x3C)) {
    Serial.println("OLED not found!");
    while (1);
  }
  display.clearDisplay();
  display.setTextColor(SSD1306_WHITE);
}

void loop() {
  float t = bme.readTemperature();
  float h = bme.readHumidity();
  float p = bme.readPressure() / 100.0F;   // Pa -> hPa

  display.clearDisplay();
  display.setTextSize(1);
  display.setCursor(0, 0);
  display.println(" Ogbugbu Weather");
  display.println(" --------------------");
  display.setTextSize(2);
  display.setCursor(0, 18);
  display.print(t, 1); display.println(" C");
  display.setCursor(0, 36);
  display.print(h, 1); display.println(" %");
  display.setCursor(0, 54);
  display.setTextSize(1);
  display.print("Pressure: "); display.print(p, 1); display.print(" hPa");
  display.display();

  Serial.printf("%.1f C, %.1f %%, %.1f hPa
", t, h, p);
  delay(2000);
}
How the Code Works
I2C is a shared bus: every device listens to the same SDA and SCL lines and answers only when its own address is called. That’s why the BME280 and the OLED connect to GPIO21 and GPIO22 in parallel, the Wiring column of the table literally repeats. Wire.begin(21, 22) makes those pins explicit on the ESP32, whose I2C pins aren’t fixed like an Arduino’s.
Pressure arrives in pascals and is divided by 100 to get the hPa (millibar) unit used in weather forecasts. Normal sea-level pressure is around 1013 hPa; a steady drop of 1–2 hPa per hour often means approaching rain. The display layout uses two text sizes, big numbers for temperature and humidity, small text for pressure, all drawn to an off-screen buffer and pushed with one display.display() call to avoid flicker.
Testing and Troubleshooting
If the OLED works but the sensor is “not found”, your BME280 is probably at address 0x77, change bme.begin(0x76) accordingly (run an I2C scanner to check). Some cheap boards labelled BME280 are actually BMP280 (no humidity), humidity will read 0 or NaN. If nothing works at all, confirm both modules are 3.3V-logic versions and that SDA/SCL aren’t swapped.
Conclusion
Your desk now has its own micro weather service. Next steps: compute a pressure-trend arrow from the last hour of readings, push the data to the web dashboard from this series, or add a battery and deep sleep for an outdoor station.
Found this tutorial helpful? Share it with a fellow maker and check out more builds on Ogbugbu Technologies!