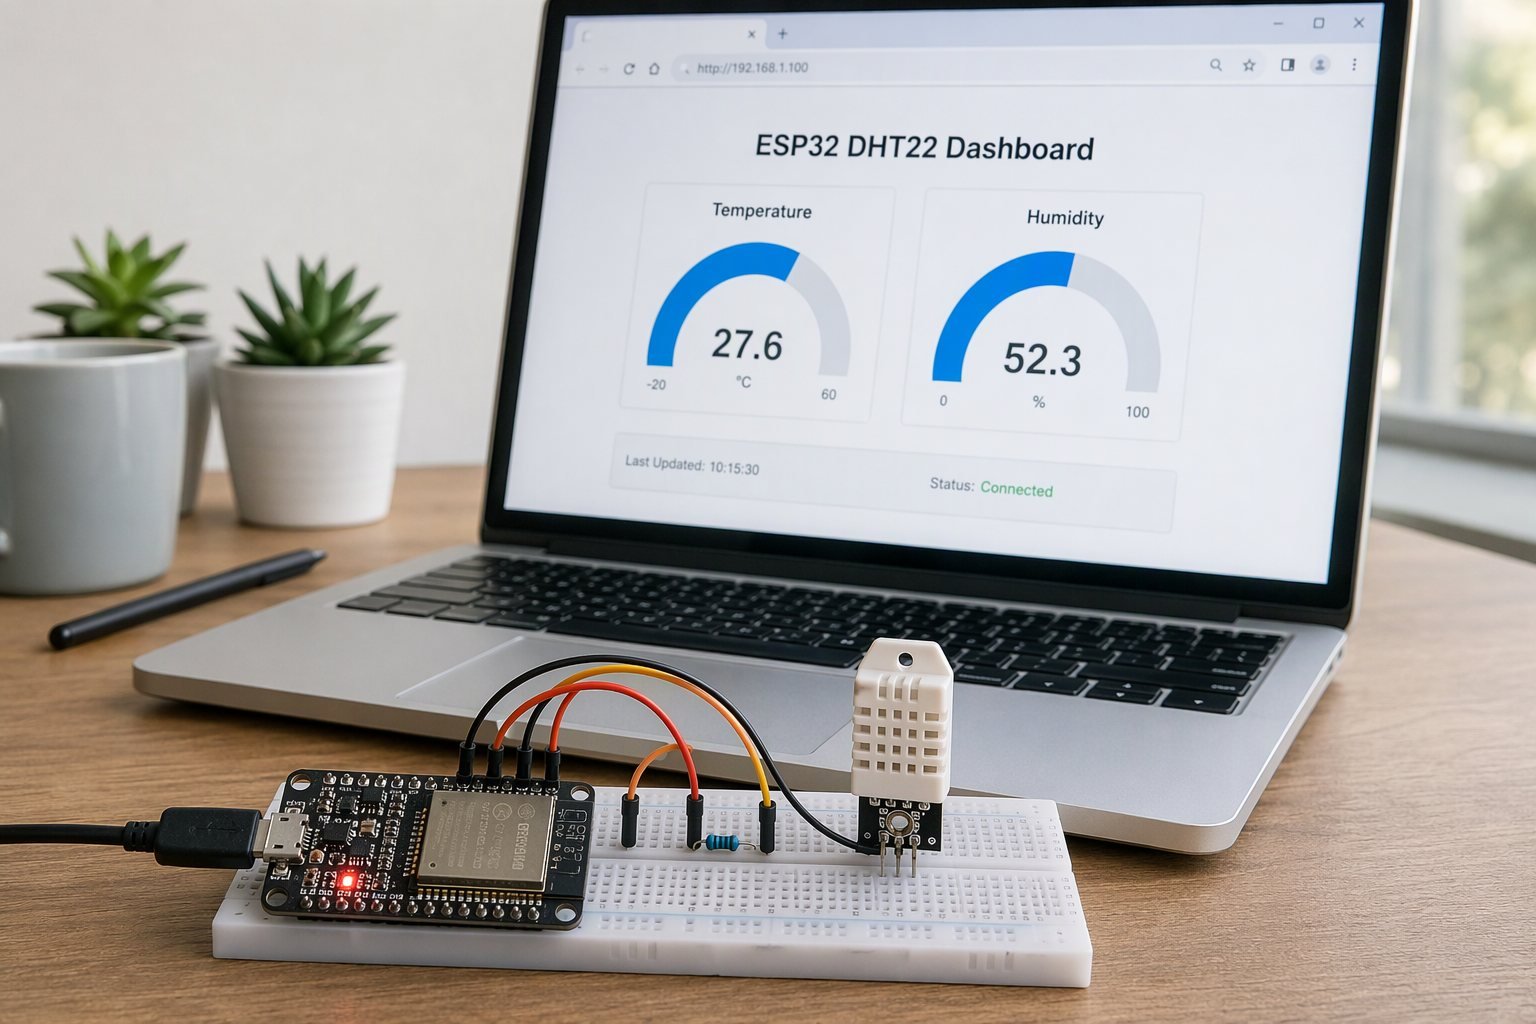

Yesterday’s DHT11 Arduino monitor showed readings on an LCD; today the ESP32 serves them to any browser on your network. A DHT22 sensor feeds temperature and humidity to the board, which renders a clean auto-refreshing dashboard, no cloud account, no app, no subscription. Anyone on your Wi-Fi can check the room conditions from their phone.
The DHT22 is the DHT11’s more accurate sibling: ±0.5°C instead of ±2°C, and it measures down to −40°C, all for about double the price.
Components Required
- ESP32 DevKit
- DHT22 (AM2302) temperature & humidity sensor module
- Breadboard and jumper wires
- 2.4 GHz Wi-Fi network
Circuit Diagram and Wiring

ESP32 PinComponent PinWire Color (diagram)3V3DHT22 VCCRedGPIO4DHT22 DATAGreen
| GND | DHT22 | GND | Black |
The Code (Arduino IDE with ESP32 core)
/*
* ESP32 DHT22 Live Web Dashboard
* Ogbugbu Technologies - ogbugbu-technologies.com.ng/
* Library: "DHT sensor library" by Adafruit
*/
#include <WiFi.h>
#include <WebServer.h>
#include <DHT.h>
const char* WIFI_SSID = "YourWiFiName"; // <-- change
const char* WIFI_PASS = "YourWiFiPassword"; // <-- change
#define DHTPIN 4
#define DHTTYPE DHT22
DHT dht(DHTPIN, DHTTYPE);
WebServer server(80);
float tempC = NAN, humidity = NAN;
unsigned long lastRead = 0;
String page() {
String h = "<!DOCTYPE html><html><head>";
h += "<meta http-equiv='refresh' content='5'>"; // auto-refresh every 5 s
h += "<meta name='viewport' content='width=device-width, initial-scale=1'>";
h += "<style>body{font-family:sans-serif;text-align:center;background:#0f172a;color:#fff;padding-top:40px;}"
".card{display:inline-block;background:#1e293b;border-radius:16px;padding:24px 48px;margin:10px;}"
".v{font-size:48px;font-weight:bold;color:#38bdf8;}</style></head><body>";
h += "<h1>Room Conditions</h1>";
if (isnan(tempC)) {
h += "<p>Sensor warming up...</p>";
} else {
h += "<div class='card'><div class='v'>" + String(tempC,1) + "°C</div>Temperature</div>";
h += "<div class='card'><div class='v'>" + String(humidity,1) + "%</div>Humidity</div>";
}
h += "<p style='color:#64748b'>Ogbugbu Technologies - auto-refreshes every 5s</p>";
h += "</body></html>";
return h;
}
void setup() {
Serial.begin(115200);
dht.begin();
WiFi.begin(WIFI_SSID, WIFI_PASS);
while (WiFi.status() != WL_CONNECTED) delay(400);
Serial.print("Dashboard: http://");
Serial.println(WiFi.localIP());
server.on("/", []() { server.send(200, "text/html", page()); });
server.begin();
}
void loop() {
server.handleClient();
if (millis() - lastRead > 2000) { // DHT22 max rate: once per 2 s
lastRead = millis();
float t = dht.readTemperature();
float hm = dht.readHumidity();
if (!isnan(t) && !isnan(hm)) { tempC = t; humidity = hm; }
}
}How the Code Works
Two design choices make this feel like a real product. First, a <meta http-equiv='refresh'> tag makes every browser reload the page itself every five seconds, zero JavaScript needed. Second, sensor reading is decoupled from serving pages: a timer in loop() updates the values at the DHT22’s maximum rate, so a burst of page loads never overwhelms the slow sensor.
The dashboard styling is a dark card layout built entirely with inline CSS, which keeps the whole interface inside the one file the ESP32 serves. Failed readings (NaN) keep the last good value instead of flashing errors at the viewer, an important pattern for any sensor dashboard.
Testing and Troubleshooting
If the page shows “Sensor warming up…” forever, the DHT22 wiring is wrong or the module lacks its pull-up resistor (raw sensors need 10k between DATA and 3V3). Readings of exactly 0.0 or -999 usually mean a loose DATA wire. If the page is slow to load, your Wi-Fi signal at the board is weak, the ESP32 antenna area should hang off the edge of the breadboard.
Conclusion
You now have a self-hosted climate monitor. Upgrade ideas: add charts by embedding a tiny JavaScript graph, log history to SPIFFS, or add an mDNS hostname so you can visit http://room.local instead of typing an IP.
Found this tutorial helpful? Share it with a fellow maker and check out more builds on Ogbugbu Technologies!