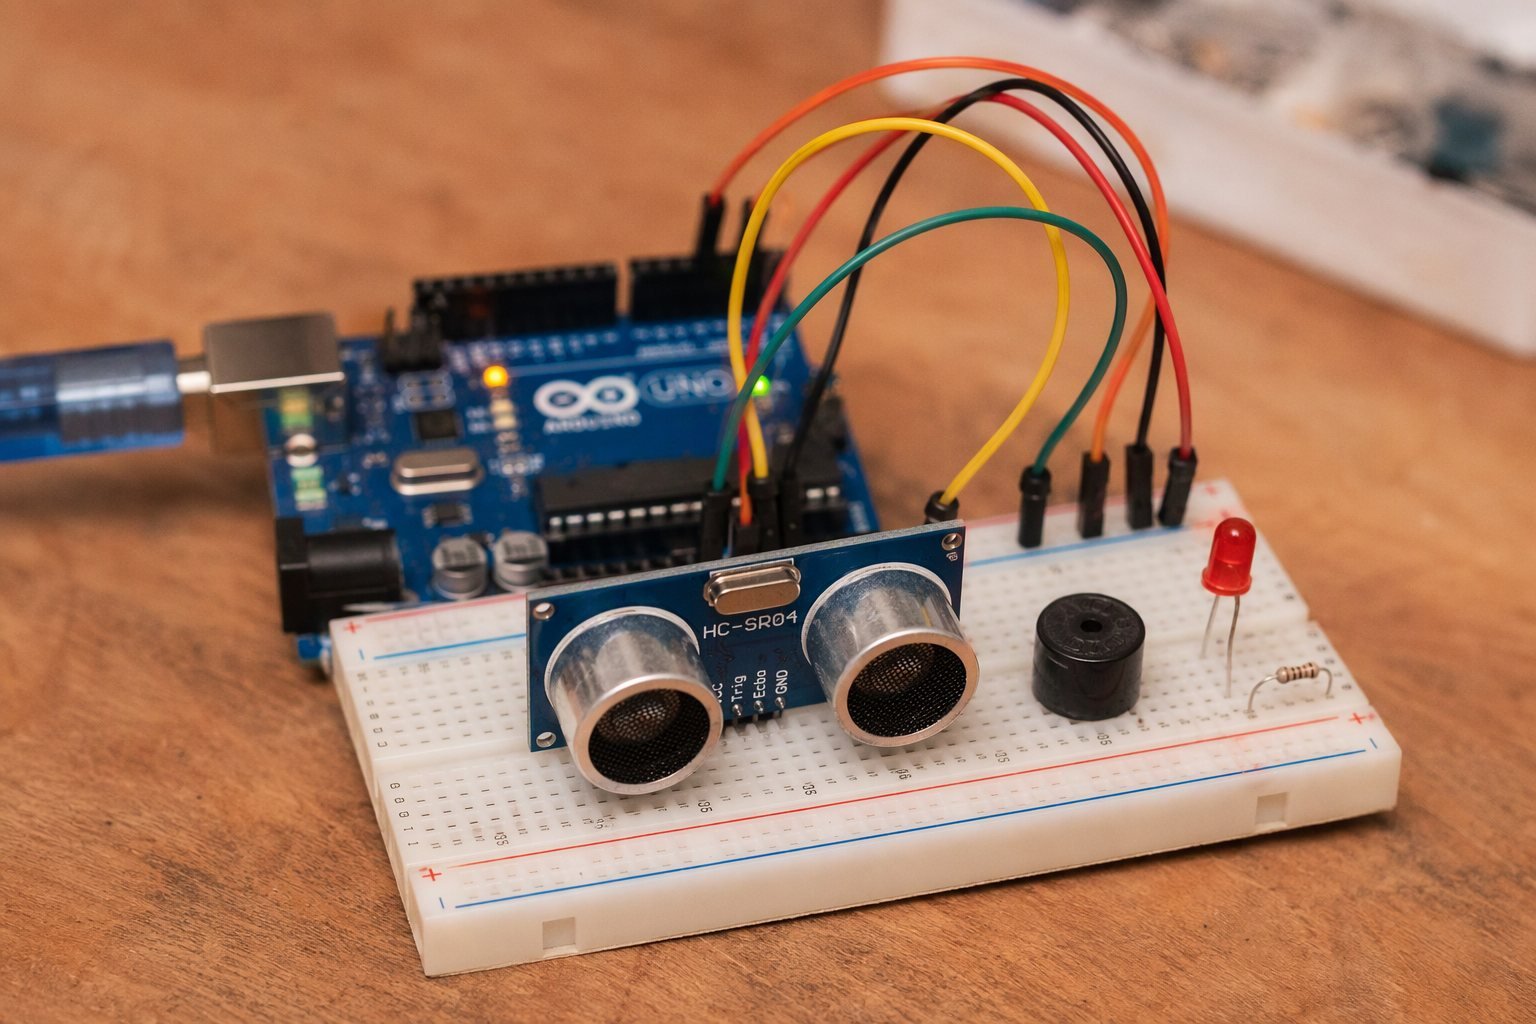

The HC-SR04 ultrasonic sensor measures distance by bouncing sound waves off objects, exactly like a bat. In this project you’ll combine it with a piezo buzzer and an LED to build a parking-style proximity alarm: the closer an object gets, the faster the buzzer beeps, and when something gets dangerously close the alarm sounds continuously. It’s the same principle used in car reverse-parking sensors.
This build teaches you precise timing with pulseIn(), non-blocking beeping patterns and threshold logic, all of which transfer directly to robotics and obstacle-avoidance projects.
Components Required
- Arduino Uno (or Nano)
- HC-SR04 ultrasonic distance sensor
- Active piezo buzzer
- Red LED
- 220Ω resistor
- Breadboard and jumper wires
Circuit Diagram and Wiring

The Code (Arduino IDE)
/*
 * Arduino HC-SR04 Parking Sensor with Buzzer Alarm
 * Ogbugbu Technologies - ogbugbu-technologies.com.ng/
 */
#define TRIG_PIN 9
#define ECHO_PIN 10
#define BUZZER_PIN 8
#define LED_PIN 7

void setup() {
  Serial.begin(9600);
  pinMode(TRIG_PIN, OUTPUT);
  pinMode(ECHO_PIN, INPUT);
  pinMode(BUZZER_PIN, OUTPUT);
  pinMode(LED_PIN, OUTPUT);
}

long readDistanceCM() {
  digitalWrite(TRIG_PIN, LOW);
  delayMicroseconds(2);
  digitalWrite(TRIG_PIN, HIGH);      // send a 10us pulse
  delayMicroseconds(10);
  digitalWrite(TRIG_PIN, LOW);
  long duration = pulseIn(ECHO_PIN, HIGH, 30000);  // 30ms timeout
  long distance = duration * 0.0343 / 2;           // speed of sound
  return distance;
}

void loop() {
  long d = readDistanceCM();
  Serial.print("Distance: "); Serial.print(d); Serial.println(" cm");

  if (d > 0 && d <= 10) {          // danger zone: continuous alarm
    digitalWrite(BUZZER_PIN, HIGH);
    digitalWrite(LED_PIN, HIGH);
  } else if (d <= 30) {            // warning zone: beeps get faster as you approach
    digitalWrite(LED_PIN, HIGH);
    digitalWrite(BUZZER_PIN, HIGH);
    delay(50);
    digitalWrite(BUZZER_PIN, LOW);
    delay(d * 10);                 // pause shrinks as distance shrinks
  } else {                         // all clear
    digitalWrite(BUZZER_PIN, LOW);
    digitalWrite(LED_PIN, LOW);
  }
  delay(60);
}
How the Code Works
The function readDistanceCM() sends a clean 10-microsecond trigger pulse, then measures how long the ECHO pin stays HIGH with pulseIn(). That time is the round trip of the sound burst, so we multiply by the speed of sound (0.0343 cm/µs) and divide by two. The 30 ms timeout prevents the sketch from hanging when nothing is in range.
The loop() uses three zones. Below 10 cm the alarm is continuous. Between 10 and 30 cm the buzzer beeps, and the pause between beeps is proportional to the distance (d * 10 ms), so the beeping naturally speeds up as an object approaches, exactly like a real parking sensor. Above 30 cm everything stays quiet.
Testing and Troubleshooting
Point the sensor at a flat wall and slide a book towards it while watching the Serial Monitor. If you get a constant 0 cm, the ECHO wire is loose or the sensor is faulty. If readings jump wildly, add a small delay between measurements (already included) and keep the sensor away from soft, sound-absorbing surfaces like curtains, which ultrasonics struggle to detect.
Conclusion
With under ten dollars of parts you’ve built a genuinely useful proximity alarm. Mount it on the back of a robot chassis, a garage wall or a gate. Next upgrade: drive four HC-SR04 sensors at once, or show the distance on the OLED display from our earlier tutorial.
Found this tutorial helpful? Share it with a fellow maker and check out more builds on Ogbugbu Technologies!